
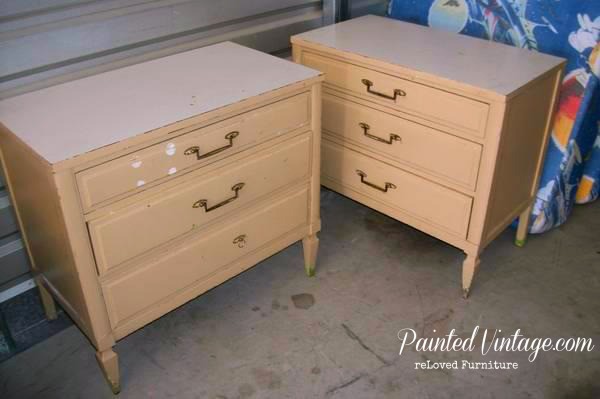
Today I am so excited to share with you my reveal of this pair of classic Two-Toned Nightstands!
My client found these 1970′s Nightstands Craigslist. She really scored with these!
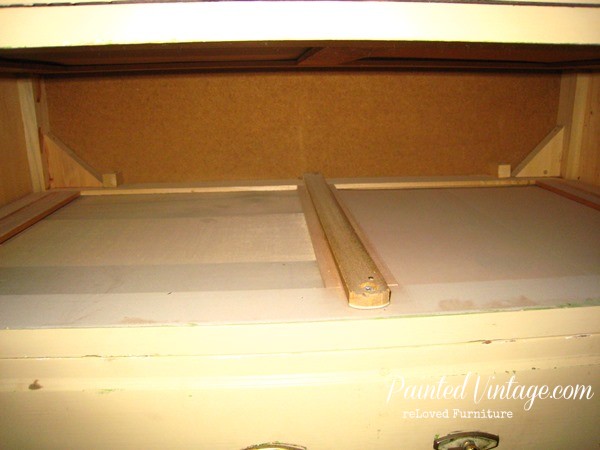
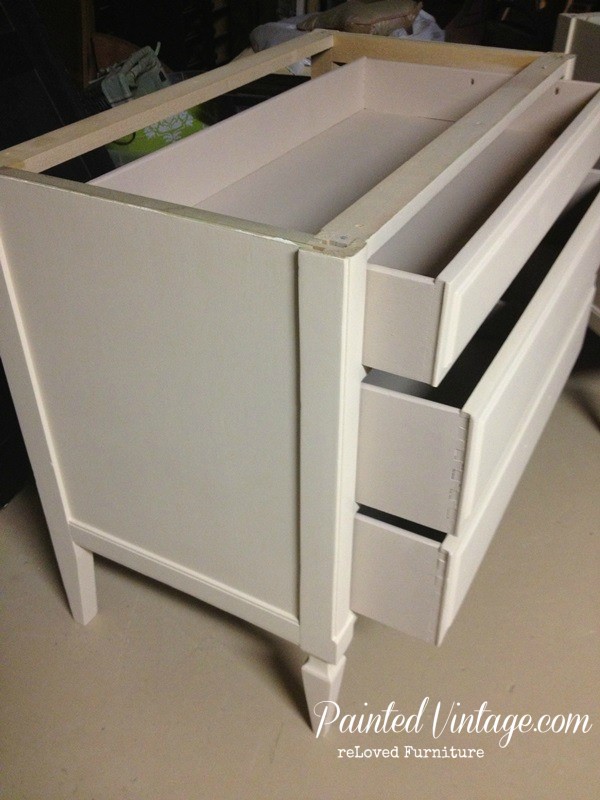
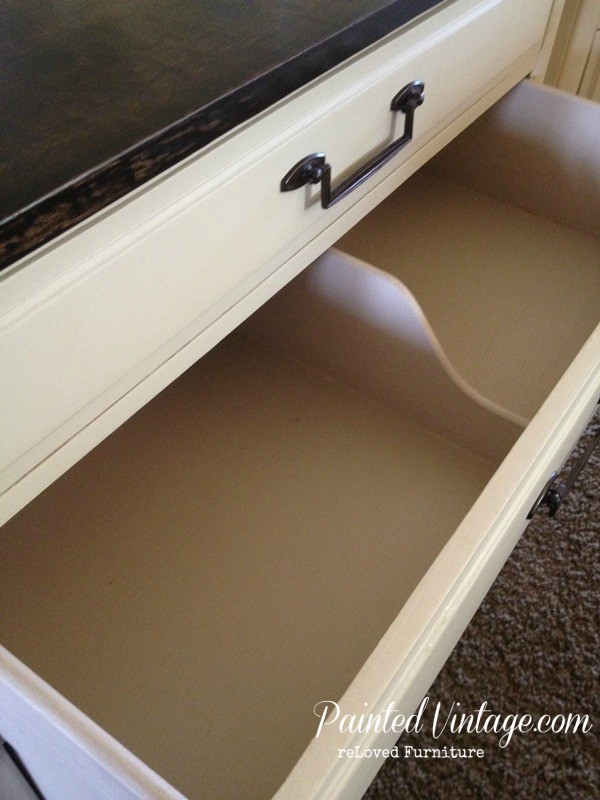
The drawers had dove tail joints,

drawer dividers…

and even dust covers.
They just don’t make them like that anymore!
I loved the lines…
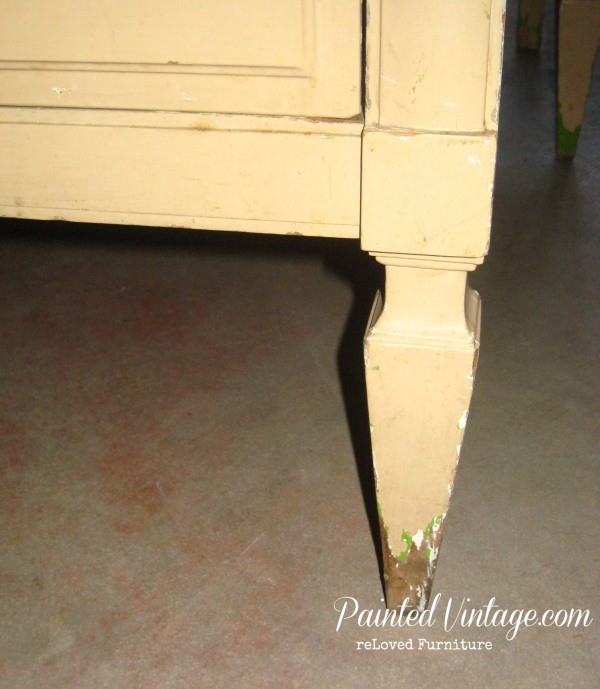
Loved the legs…
So much potential here!!
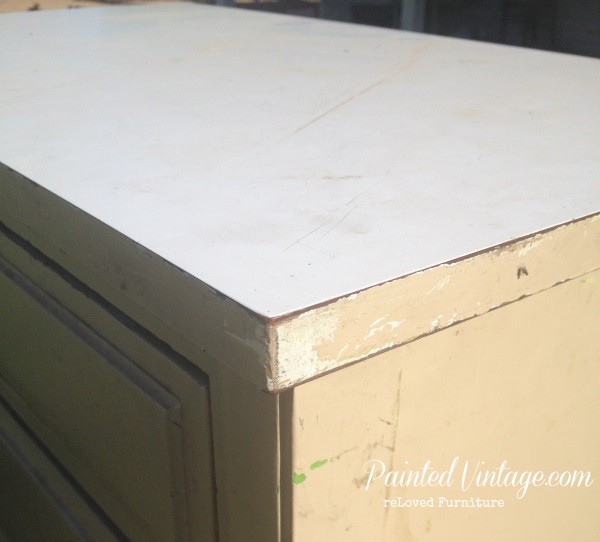
I REALLY didn’t
love
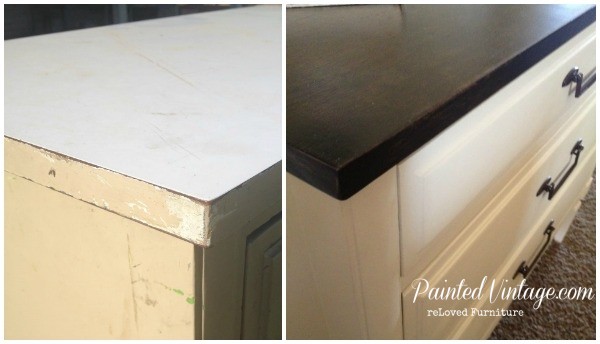
the laminate tops…
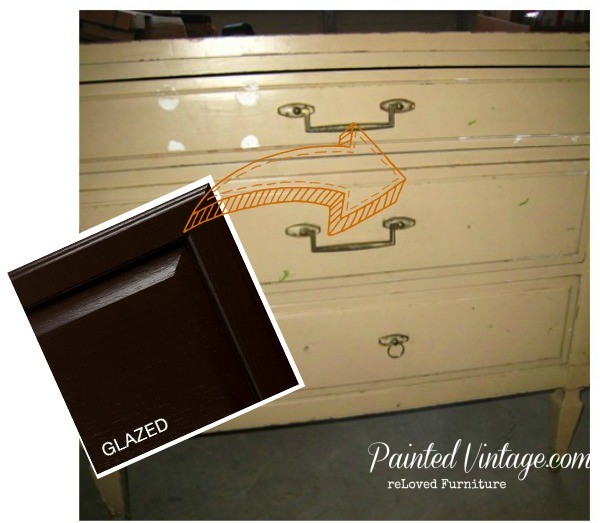
We originally talked about repainting the nightstands a dark espresso brown, with a rich glaze over.
At that time, my client did not want a two-toned finish, rather she wanted to play it safe with one solid color that would coordinate with any decor or color changes she made in her bedroom.
Something like this maybe…
But as I started working on them, I just couldn’t get past the laminate tops. Honestly, it would have been no problem to paint over the laminate…
But these nightstands wanted to be reLoved! They were just begging me for new, dark stained, rich wood!
Look at these little guys, how could I tell them “NO”?
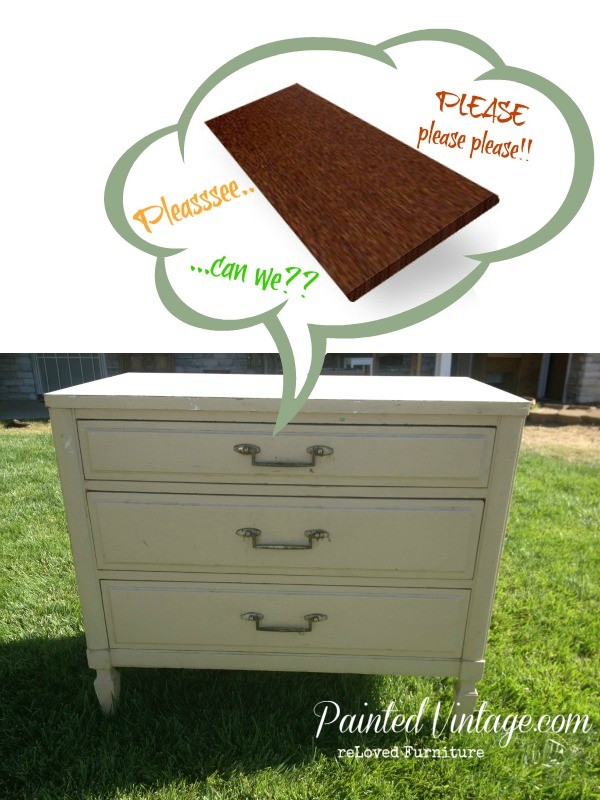
Soooo, after begging talking my client into letting me replace the tops. We changed our scope of work slightly: Paint 70′s nightstands boring brown a classic neutral cream with rich espresso stained wood tops, resulting in graceful Two-Toned Nightstands that will add a touch elegance to any decor!!
reLoved Two-Toned Nightstands
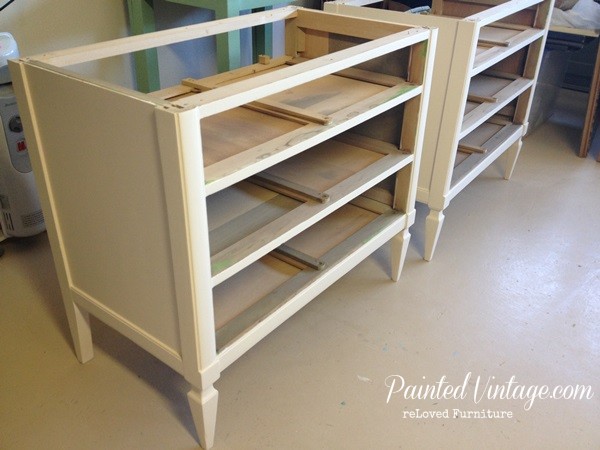
I started sanding the many, many layers of paint down to a smooth finish.
…Why yes, that is me working in the dark!

And again in the early morning light…

Then I removed the laminate tops and the backs, which were also being replaced.
The next step was priming with my favorite primer, Zinsser Cover Stain. Oh how I am in DEEP LOVE with this primer! Let me count the reasons:
- Oil Based, which means it has great adhesion!
- Stain Blocking, which means it will seal stains such as water, crayon, marker, and nicotine. Use it when your painting over very dark or hideous colors. It will also help seal in odors, which are common with old abused furniture.
- And did I mention, it dries in less than an hour?
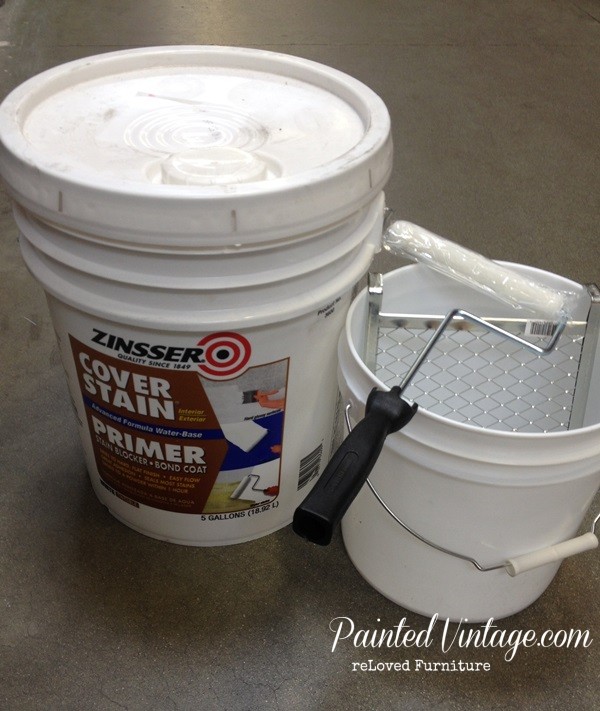 Cover Stain is my go-to primer, and I use it on almost EVERYTHING! (and no, Zinsser does not pay me to say that, but they are more than welcome to start anytime!)
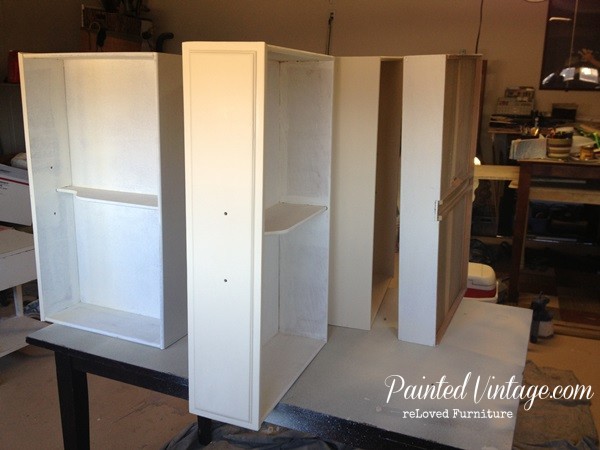
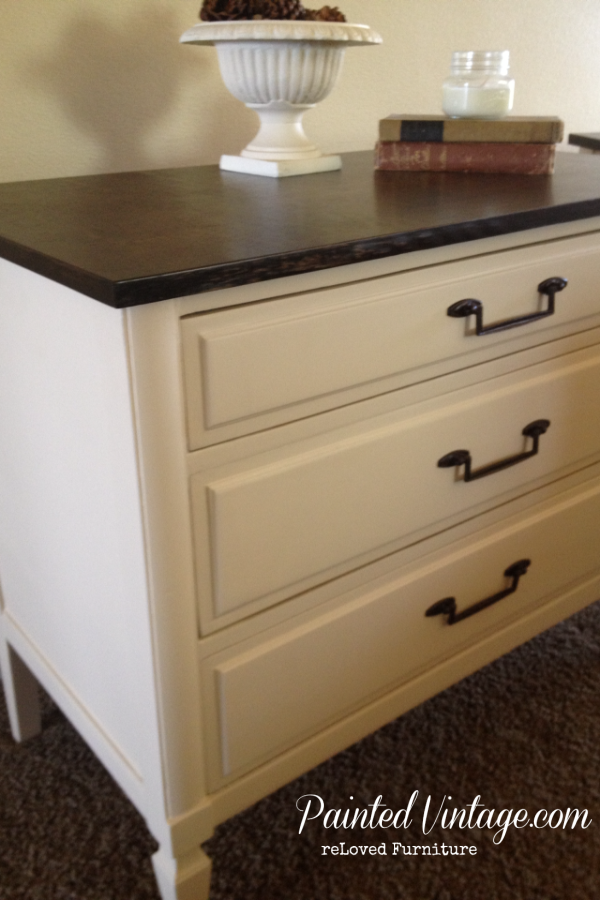
Then two coats of this dreamy creamy finish color. Which, by the way, is Sherwin Williams SW7537 “Irish Cream”
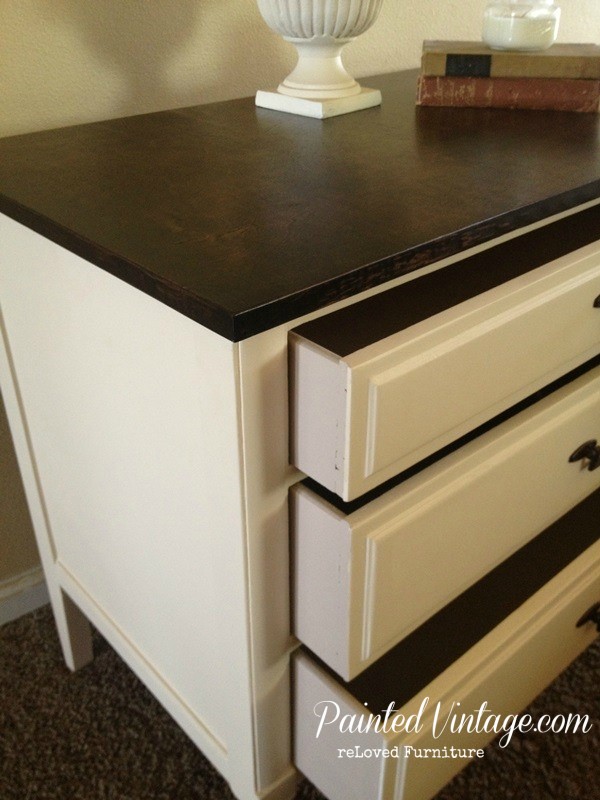
The interior of the drawers and the drawer sides were painted in Sherwin Williams SW7536 “Bittersweet Stem”, a slightly darker shade than the body color for a warm and subtle contrast.
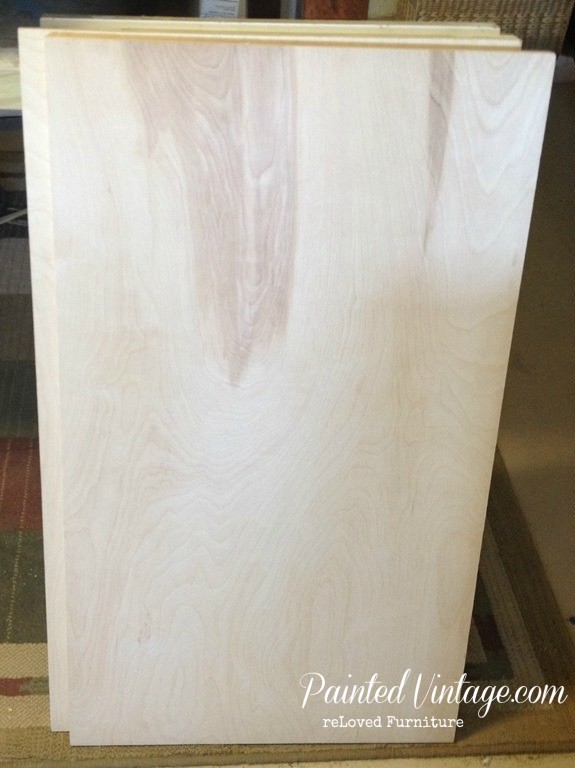
Now here’s where the biggest transformation comes in, and a dream come true for these happy little nightstands.
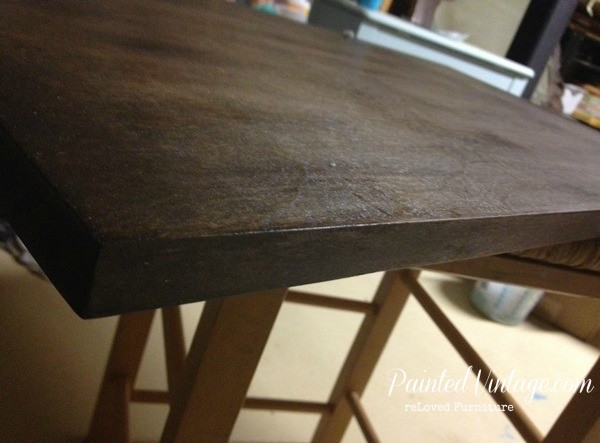
I replaced the previous laminate tops with this gorgeous 3/4″ Birch Plywood.
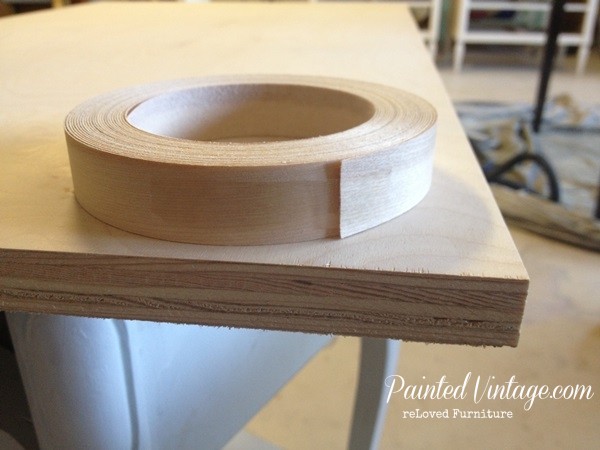
If you’re going to do a project like this- be sure you cover the edges with Veneer Edging.
Otherwise, it will look unfinished when you stain it. Then it just looks like, well… plywood.
After the edging was applied, I sanded everything smooth and went over it with a tack rag to remove all the fine dust.
To avoid a blotchy finish on the birch plywood, I used Minwax Pre-Stain Wood Conditioner.
This was followed by Rust-oleum Ultimate Wood Stain in “Kona”.

It was the first time I tried the Kona color. I think its beautiful!!
See how the edges blend for a finished look?
Then 3 coats of Polycrylic later…
The moment I’ve been dying to show you!!

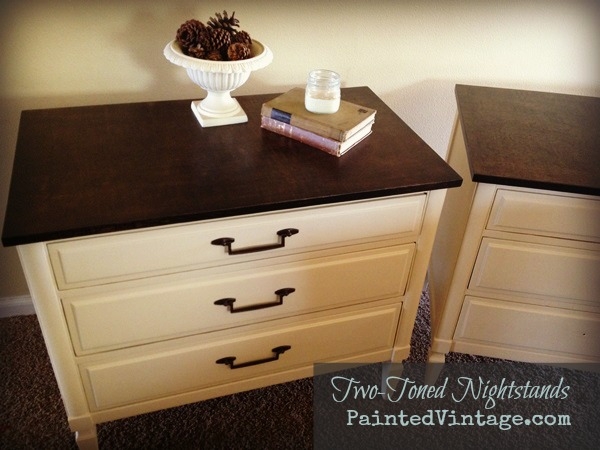
The big exciting reveal of a pair of classic reLoved Two-Toned Nightstands…

I think the dark wood top looks amazing!
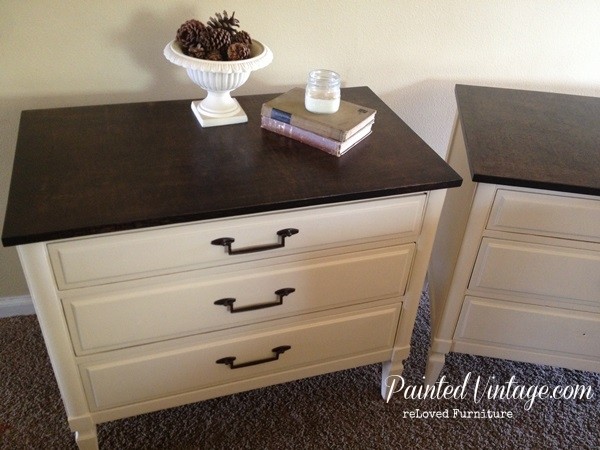
The SW Irish Cream color used on the body of the nightstands is one of my favorite whites.
It is a warm, yet neutral classic.
And the SW Bittersweet Stem that I used on the drawers is not too shabby either!
Exactly what my client wanted, just enough of a contrast!
Nice, Clean, Fresh and reLoved!!
So, what do you think of this makeover?
I hope I have inspired you to ditch those laminate tops!!
Google+


I’m thrilled to know about the tape.
Hi Sherri! I’m new to your blog but love your stuff, and how well you explain! I want to do this exact color combo on a 3 piece bedroom set that was bought used by my grandma in 1942, and was restained at least once, a shiny cherry color, in the 70s. I don’t know if oil or water based… It’s veneer and I don’t want to do more sanding then I have too because I’m not sure how much is left!!!! But I want the tops of the chifferobe and vanity to be a nice dark Kona color and the bodies vintage white, and I don’t want to destroy this family treasure. So if I may ask a couple questions…1. Could I just lightly sand the tops and then do this stain? Would a gel stain be better? and then polycrylic? 2. For the body, how much do I need to sand? I love this look but I love the idea that chalk paint is supposed to be so easy, why did you choose latex over chalk for this piece? Can I not sand and just prime (for odor) and then chalk? 3. If I maybe want to do a little dark wax over polycrylic (I read your other post!) would that only work on chalk paint? 4. And finally, how do you get those drawers to pull smoothly when it’s paint on paint, without it rubbing off?
I know you’re not my personal paint consultant but any help you have would be so appreciated! Thank you!
This tutorial is exactly what I’m looking for! I’m updating a dresser and after stripping the paint I discovered it has a laminate top. I am now planning to replace it with the maple plywood as you did. Great idea! My question is, what did you replace the back of the dresser with?
Thank you so much!
Hi Grace- I used very thin (1/8″) hardboard and cut to fit. It’s about $8.00 for a 4′ x 8′ sheet.
Sherri, how do you apply the zinnser primer?? I’ve tried using it in the past but I tried rolling it on (with one of those small rollers for smooth surfaces) and it leaves the paint kind of bumpy or dimpled. And I’ve used a brush, but it leaves pretty deep lines. Any ideas or suggestions? And by the way, they look beautiful.
Thanks
Nancy
Gorgeous! Did you put 3 layers of polyacrylic on the white as well?
Hi!
I love this! How exactly did you remove the laminate top without damaging the night stand. I have a dresser that I want to do this to but I’m scared I’m going to damage the dresser trying to get the top off. Thank you!
On mine, the tops we’re screwed on… I just removed the back and took the drawers out to reveal the screws.
Hopefully yours will be that easy also!
Good luck!!
Thank you for your information and artfully done work.
These look amazing!! I have almost identical night stands and a matching dresser that I just bought. Curious what you did to the hardware?
Love how these turned out. I alway thought white was my go to paint color but I’m becoming a fan of creamier white colors. My question is how did you attach a piece of wood to the top-screws, nails, glue? I have a similar pair of night tables with less than perfect laminate tops and this seems like a terrific solution.
Hi Carol, Thank you for your kind comments! I used the existing screws that were holding the old laminate top in place. I also used wood glue before screwing it in place.
Hi! I’m definitely going to be doing this as they are BEAUTIFUL! The side tables I am re-purposing are already stained a deep cherry. Should I sand down the entire thing before starting? I know some Stains don’t need to sanded before re-staining.
It depends on what color stain you will be going over it with. I personally like to sand down to bare wood, but that is not necessarily a necessity. For instance, If I was staining it a dark mahogany, I would probably not go down to bare wood. But if I wanted a walnut finish, then yes, I would sand all of the cherry off. Hope that helps!
I love love these tables. I will keep this pin for my future projects with this paint color. I have never tried to replace the wood tops, but you made it seem so easy. Not sure how to put the veneer on the edging to look like it was professionally done. That may take practice. Great job.
Thank you! The veneer edging was super-easy!! Maybe I should do a tutorial?
Yes, please do a tutorial. That would be great!
Great post! Been looking for painting ideas for this kind of furniture. Thanks for the info!
No Problem!
To say I love this would be an understatement! I just brought some This End Up nightstands that are well made but made with what looks like basic 2 x 4s… although the top is solid wood I’m not sure I like the grain or the way it is structured, so I’m thinking I should try to replace the top as well….is there a type of brush you use or a particular way you do your paint strokes that makes the paint look so even?
Hi Gayle, I like to use a 2″ Purdy Brush and a tight napped 6″ mini roller cover (commonly referred to as a weenie roller) You can also add some Floetrol to your water-based paint to help it flow out smoother.
Sherri…these turned out so beautifully! What a wonderful job you did transforming them. The deep rich tone on the top contrasting with the creamy colored base makes them so desirable. You made a somewhat overwhelming job appear to be manageable project. Thank you for sharing your products that you used!
You’re welcome… And thank you for your comments