
After I posted this Faux Copper Patina project on FaceBook, I got several emails requesting a tutorial.
Since I wasn’t actually planning on writing a tutorial on repainting garden statues, I might not have the most helpful photos, but I’d love to share the project with you!
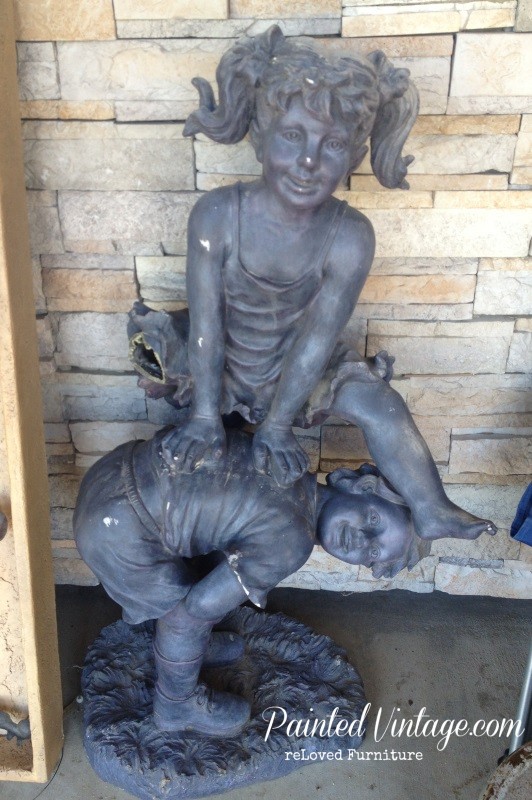
Well, I started with this resin garden statue of a couple of sweet, little children- innocently playing leap frog.
OK, who am I trying to fool?? Right from the gate, I found this statue to be in the deep end of the Creepy Pool. I even joked on FaceBook that the little boy resembled Gage Creed from Stephen King’s Pet Sematary.
Every time I looked away, I could feel his menacing eyes staring me down!
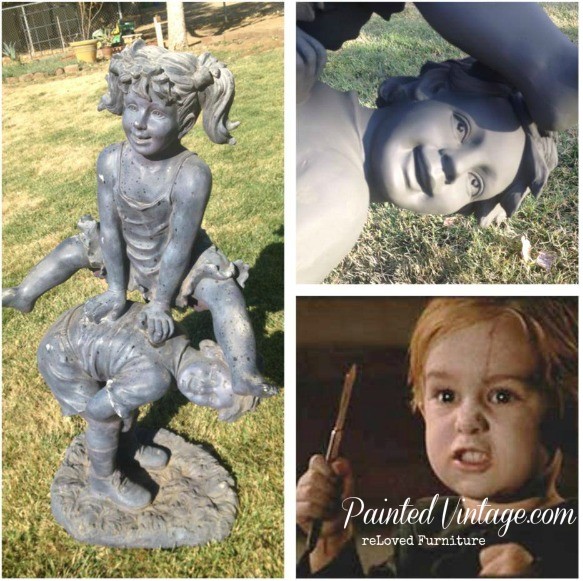
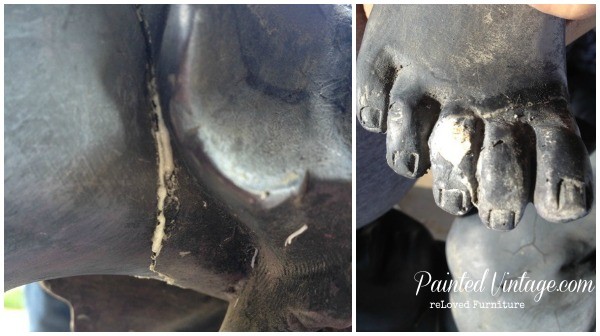
Nevertheless, no matter how sinister he seemed, they needed to be reLoved!! I sensed the little girl had fallen victim to Gage, as her injuries were more evident- a broken leg, chipped toes and several cracks.
Suspiciously, someone tried to patch her up, so there was oozing glue that needed to treated and cured.
And why is she barefoot, but Gage is not??! Hmmm…..
With a concoction of my own homemade detergent/degreaser and a stiff brush, I scrubbed all the dirt (or possibly dried blood?) out of all the cracks and crevices.
After some more TLC, her broken leg and various other fractures were reset with a two-part epoxy.
Layering of the Finishes
Copper, when it ages, takes on a greenish patina called verdigris. This verdigris takes many years to achieve and can range in color from a deep green to a chalky turquoise.
I applied several layers of finish to reproduce this Faux Copper Patina effect.
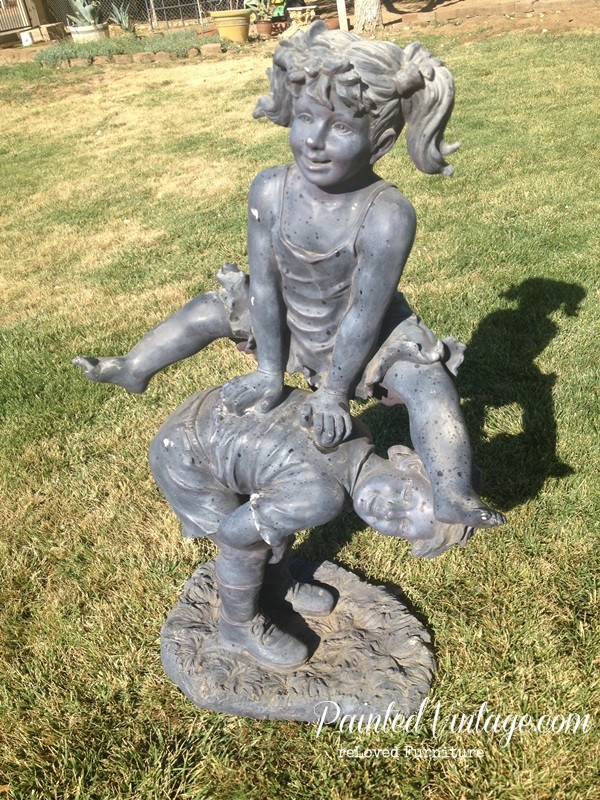
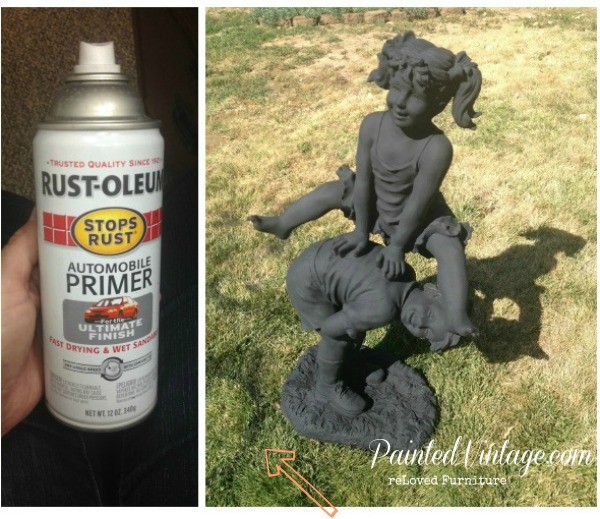
The first layer in my process, being the prime coat. I sprayed 2 coats of Rust-Oleum Automobile Primer in dark grey. The primer alone was a huge improvement! But here’s the creepy part… while I was waiting for the primer to dry, I know this statue shifted to the right… Check out the over-spray ring at the bottom of the picture!
See that?? To the left of the base??
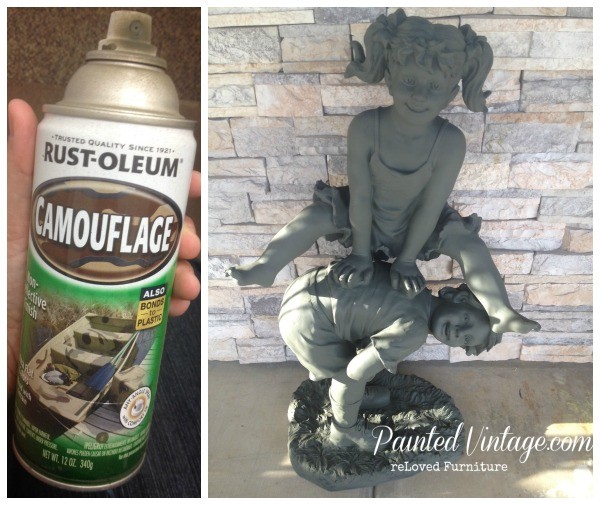
Anyway, back to the layering of the patina. For the base coat, I knew that I wanted more of a rich mossy color, as opposed to the paler turquoise. Ultimately, I opted for Rust-Oleum Camouflage spray paint in the Dark Forest Green.
This camo spray ended up being the perfect color! It really made the statue look like giant plastic Army Men!
I tried to convince myself that these were really protective freedom fighters, NOT Children of the Corn waiting to KILL ME IN MY SLEEP!
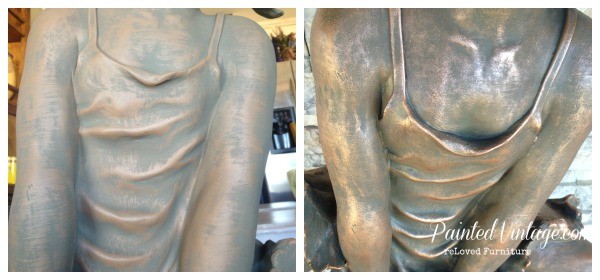
Thankful to wake up the morning, I started the next layer in the patina process, with a dry brushing technique.
I used a dark caramel color in flat exterior latex paint. The dry brush was concentrated mostly on the raised areas and places where a natural highlight would exist.
The contrast with the green was exactly what I was hoping for!
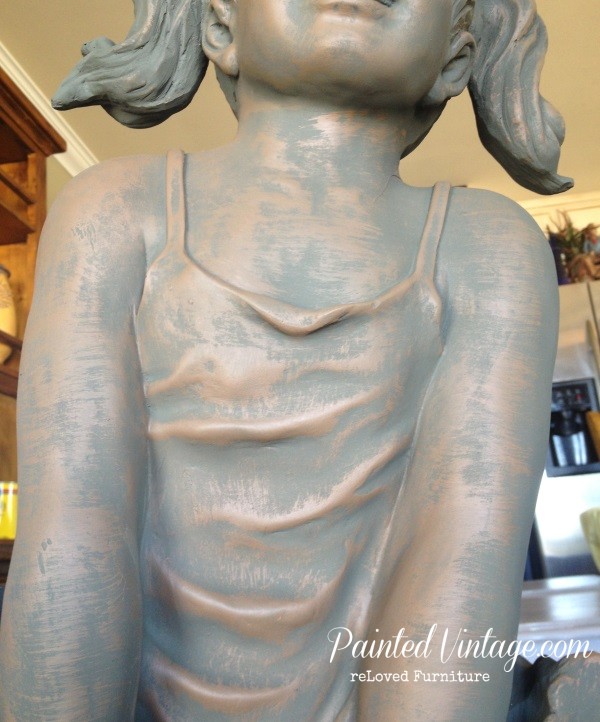
After the caramel dry brush, you can see the transformation coming along! This technique added an aged, almost rusty appearance to these little homicidal darlings. It also helped bring out all the details, and soften their features.
Well, except Gage’s… I still find his squared-off teeth rather unsettling.
Looking Good! …But still. Not. Quite. Right.
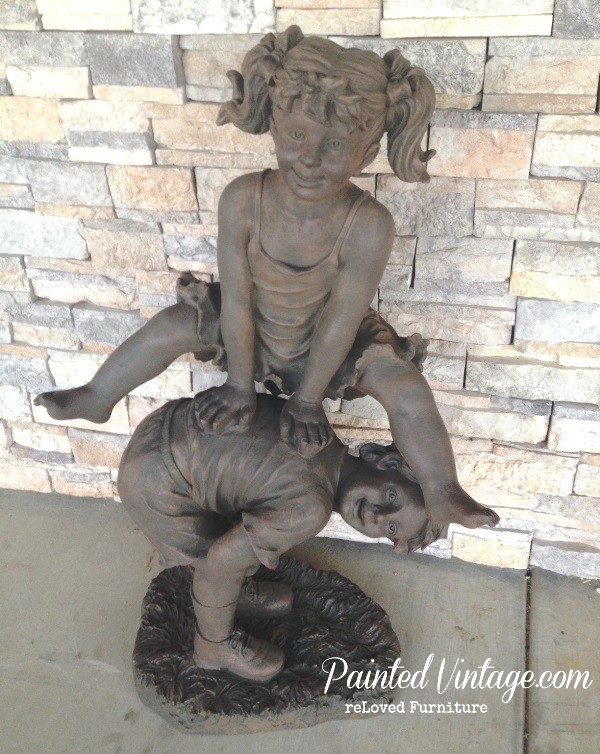
That’s where the magic-in-a-can comes in (OK, its not really a can, more of a tub, but that just doesn’t sound right). I used Martha Stewart’s Metallic Glaze in Copper Penny. Now, I’m not much of a copper-gal, but this is a glaze is oh-so lustrous.
Plus I heard it wards off trolls- so bring on the copper!!
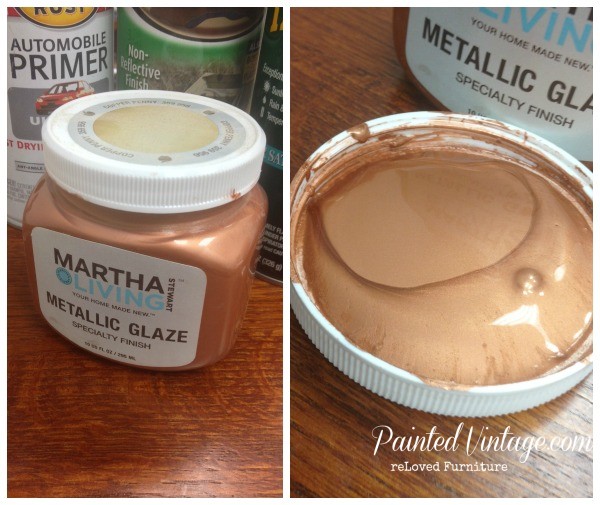
Powerful stuff this copper is! A little goes a long way. Think “less is more” here.
Working in sections, after I applied the glaze, it was hand rubbed for a more authentic appearance.
See the magic??
Seriously, THAT glaze just made everything come to life! Which is when I really got nervous and started hiding all my Xacto Knives…
You remember what Gage did to Herman Munster don’t you?!

And the little precious….
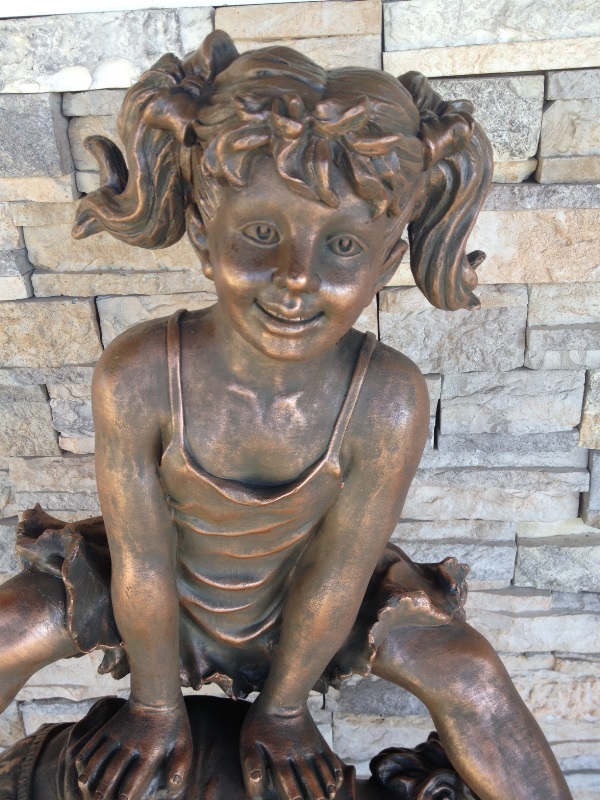
The final layer in this multi-step process was 3 light coats of a satin Spar Urethane for a rich glow, and protection from the elements.
Here I’d also like to note, the MS Metallic Glaze is an interior product. Because of the cracking and already weakened condition of this resin statue, I am going to recommend that my client display it out of the sun and not in any direct water. That being said, the Faux Copper Patina is a great interior project!
However, if you have a flamingo or a garden gnome you’d like to try it on, just remember that even with the UV protection in the Spar Urethane, the metallic glaze may fade quickly.
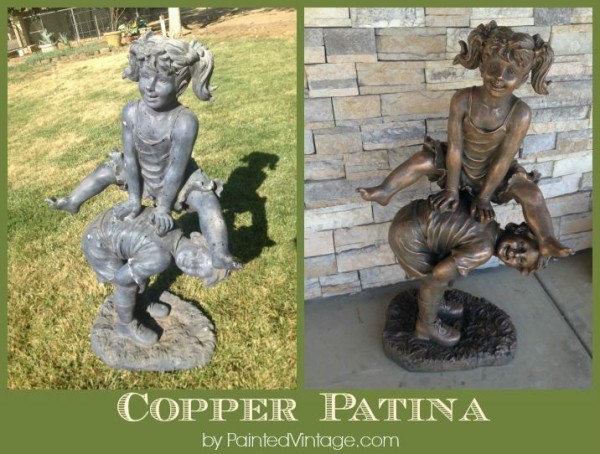
A look back at the BEFORE and AFTER
So let’s review the drastic transformation of the before and after…
BEFORE:
AFTER:
Gage??!… GAGE!!!
……………………………………………………………………………………………………………………………………………………..
Sharing over at:


Google+


Loloud!!
thanks for sharing your expertise. that was great!
Ok…I was dying laughing here!!! I’m a huge King fan and you’re right…Gage is creepy! Great post & and even better restoring job!! Thanks for sharing!
Hi Sherri,
Just stopping by to tell you how much I am enjoying your site. You have the very best painting tutorials of any I have seen. Well written, complete, and very informative.
FYI-Tremclad makes a can of copper spray paint, it works well. Great for outdoor use.
Looking forward to your seeing next project.
Thanks for sharing Sherri.
Darlene
Nova Scotia
Canada
Sherri, You’re so funny! Personally I think Little Cement Boy is trying to look up Little Cement Girl’s dress! That thing really does have creepy eyes! Anyway, started following you on Pinterest. Thanks for a good laugh!
SO funny and a fantastic job! Looks amazing! Thanks!
I was laughing so so hard while reading your post. The statue turned out fantastic, I will be taking some of your tips on the paint and techniques. Thank you for this post and the great humor along with it.
Your post was hilarious and added a little adventure to the painting process. Did you ever find Gage, the homicidal patina boy? Lol
Hi I have a statue of a little boy playing with a dragon fly I started finishing according to this technique. Unfortunately, Martha Stewart Copper Glaze is discontinued. I have searched high and low for something else to use. Any suggestions?
I know Valspar makes a copper glaze. I have not tried it, so you may want to test out the color first. Also, I think Modern Masters may have something similar…
I just came home with a garden statue from my mother… a little boy angel looking at a frog… she had gotten it for my brother’s memory… he will be turning copper! I would like it to be in the garden though, is there not a product that would work? What about a Rub N Buff? I am not sure if it comes in copper and it is pretty solid, did you put the glaze over the entre peice or just where you had the caramel color?
Look out, he has a knife!… Loved it, great tutorial, and a creative writer as well.
You crack me up.
I’m glad someone’s paying attention! LoL!! Thank you Kathy
You are my kind of girl,with a great sense of humor, and you are not afraid to use it!
Thanks Michele! …someone who gets me!! Finally!!
Amazing Job!!!
Thanks so much!
Such a charming entry,,,,I am certain Gage is lurking outside in my garden!! Icannot wait to start this project!! My garden pieces are two-toned. clothing is copper patina, however, the skin is a very dark brown with bronze undertones. Rustoleum’s spray oil rubbed bronze color is perfect for the rich, dark skin color on my piece. Thanks for this tutorial!!
Oh, you’re welcome!! How did your project turn out?
Omg. I just cracked up at your “after” photo. Thanks for this tutorial. Going to try this on a craigslist statue I’m currently eyeing….
Thanks Michaela, good luck with your Craigslist makeover!